Woodworker's Journal 2004 Summer, страница 44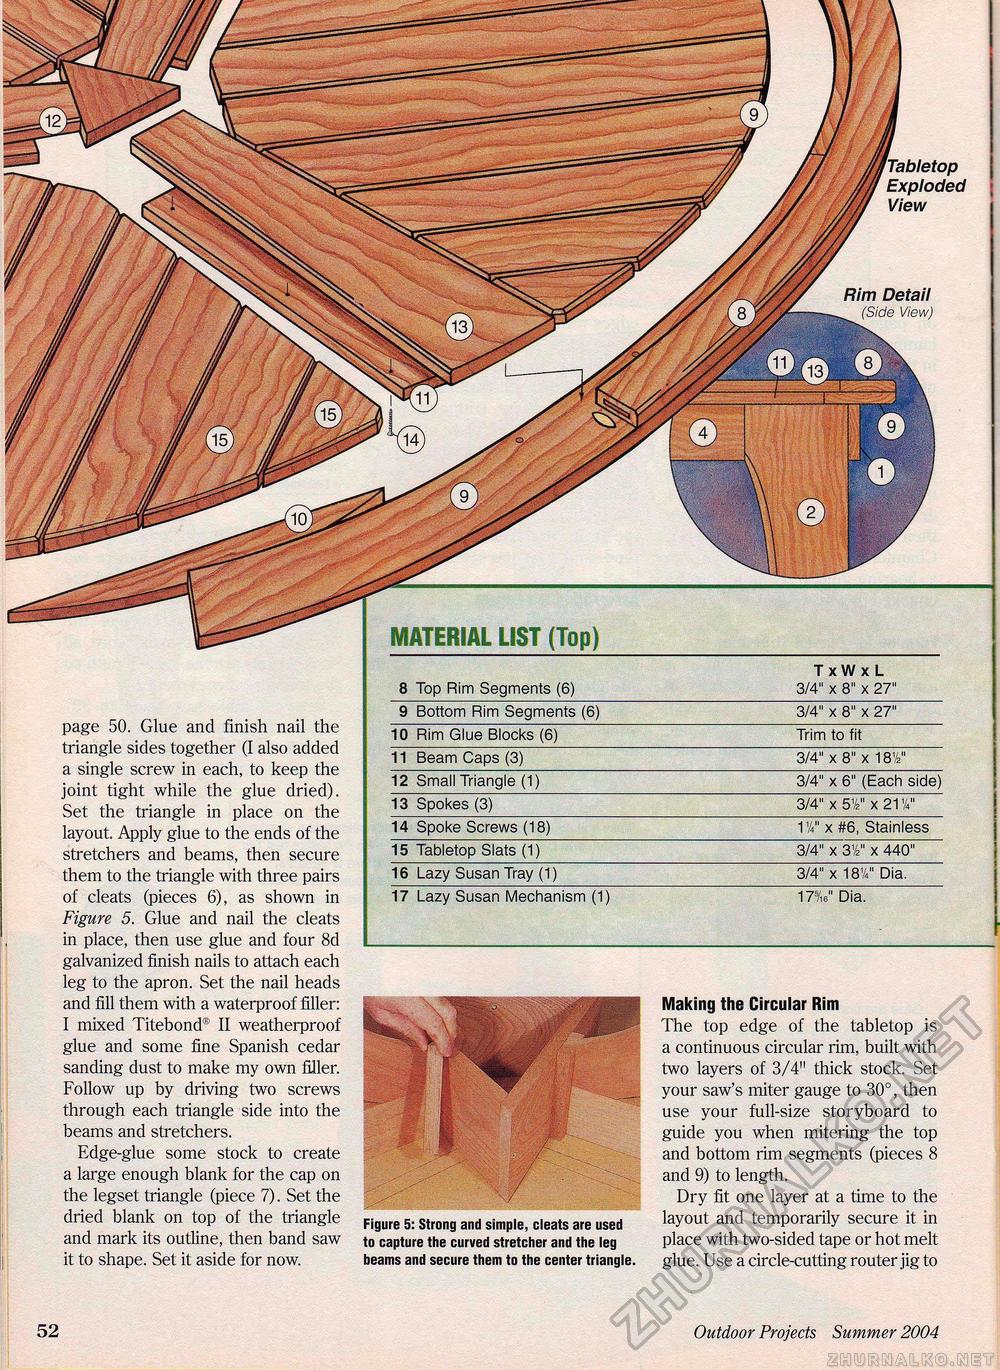
Exploded View Rim Detail (Side View) page 50. Glue and finish nail the triangle sides together (I also added a single screw in each, to keep the joint tight while the glue dried). Set the triangle in place on the layout. Apply glue to the ends of the stretchers and beams, then secure them to the triangle with three pairs of cleats (pieces 6), as shown in Figure 5. Glue and nail the cleats in place, then use glue and four 8d galvanized finish nails to attach each leg to the apron. Set the nail heads and fill them with a waterproof filler: I mixed Titebond® II weatherproof glue and some fine Spanish cedar sanding dust to make my own filler. Follow up by driving two screws through each triangle side into the beams and stretchers. Edge-glue some stock to create a large enough blank for the cap on the legset triangle (piece 7). Set the dried blank on top of the triangle and mark its outline, then band saw it to shape. Set it aside for now. MATERIAL LIST (Top) TxWxL 8 Top Rim Segments (6) 3/4" x 8" x 27" 9 Bottom Rim Segments (6) 3/4" x 8" x 27" 10 Rim Glue Blocks (6) Trim to fit 11 Beam Caps (3) 3/4" x 8" x 18V 12 Small Triangle (1) 3/4" x 6" (Each side) 13 Spokes (3) 3/4" x 5V x 21V 14 Spoke Screws (18) 1V x #6, Stainless 15 Tabletop Slats (1) 3/4" x 3 V x 440" 16 Lazy Susan Tray (1) 3/4" x 181/4" Dia. 17 Lazy Susan Mechanism (1) MV Dia. Figure 5: Strong and simple, cleats are used to capture the curved stretcher and the leg beams and secure them to the center triangle. Making the Circular Rim The top edge of the tabletop is a continuous circular rim, built with two layers of 3/4" thick stock. Set your saw's miter gauge to 30°, then use your full-size storyboard to guide you when mitering the top and bottom rim segments (pieces 8 and 9) to length. Dry fit one layer at a time to the layout and temporarily secure it in place with two-sided tape or hot melt glue. Use a circle-cutting router jig to 52 Outdoor Projects Summer 2004 £ |


